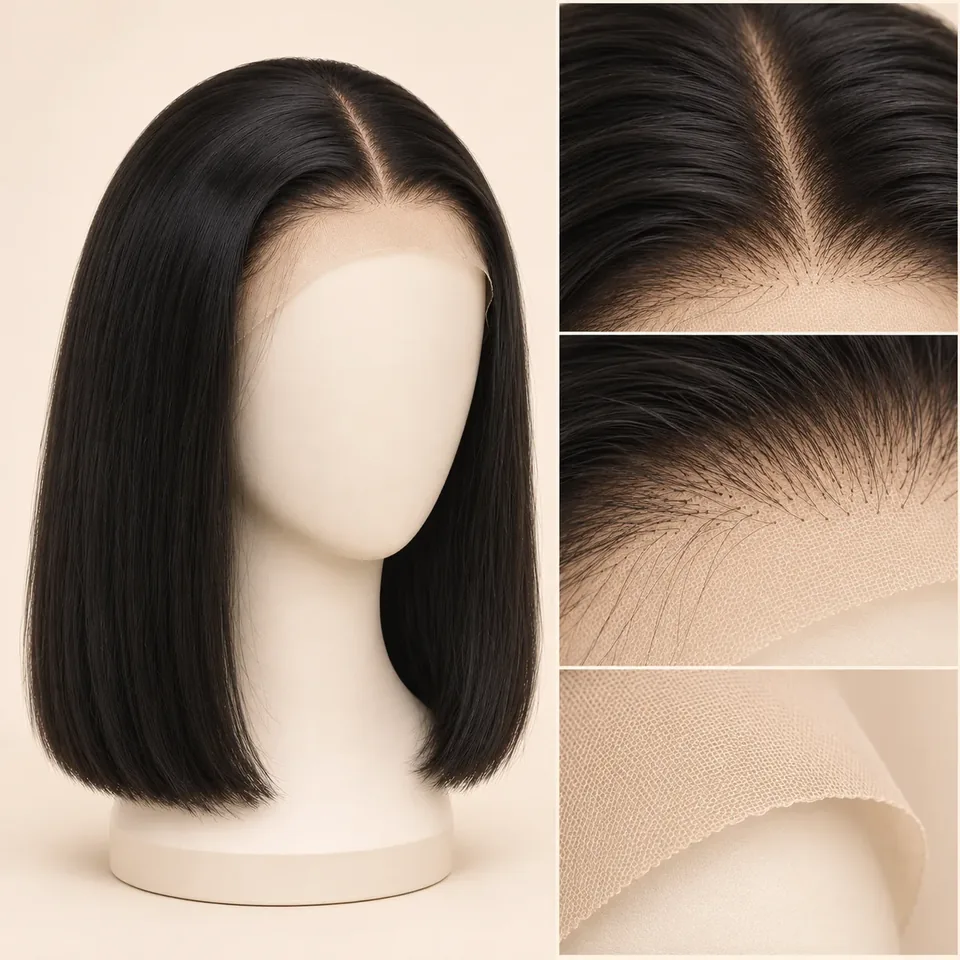
A sample wig arrives with a set of photos: front, side, back, a close-up of the part, a close-up of the hairline and a view inside the cap. All six are taken in daylight, without filters. Many buyers look at the front view, decide it looks right, and approve. Most of what goes wrong on a reorder, though, shows up in the other five photos first. This article goes through the set one view at a time: what to look at in each, how to flag a change so the revision fixes only that, and what the photos are used for after you approve. It is written for wig boutiques, distributors, salons, medical wig shops and private label brands reviewing their first sample wigs.
Why every view is shot in daylight, without filters
Shade is the field that photos distort most. Warm indoor light pulls blondes toward gold: Ash reads close to Beige, Champagne reads close to Honey, and Honey starts to look yellow or orange. Grey and salt-and-pepper look yellow under warm light and whiter in direct sun. A filter does the same thing on purpose. So the sample photos are taken in natural daylight with no filter, and every sample of the same wig is shot the same way. When you compare the photos with the wig in your hand, look at both near a window rather than under shop lighting. The wig colour chart explains how each of the ten shades behaves in different light.
Front, side and back: the cut and the shade from root to end
The front view shows whether the face-framing pieces fall where you asked and whether both sides match. On layered styles, check where the first layer lands: cheek, chin or collarbone. On a bob or lob, check the cut line at the face, at the sides and at the nape. The side view shows how the wig sits against the face and whether bangs lie flat or lift slightly. The back view shows how the nape is finished and, on balayage and dark-root shades, whether the lighter pieces blend or sit in stripes. When the lighter pieces vary in width and start at different heights, they blend. When they are all the same width and start at the same height, they read as stripes.

The part and hairline close-ups: where a wig looks real or not
The hairline close-up is where a lace front earns its place. Look at the lace edge: it should sit flat, without a visible line. The front row should be tied hair by hair and lighter than the hair behind it. A hairline that looks perfectly even usually looks less natural on a person, not more. Lace colour is chosen for your clients' skin tone. If it shows against the skin you described, flag it under hairline.
The part close-up matters on monofilament tops. Check that the mesh does not show at the part, that the scalp colour looks natural under the chosen shade, and that the hair is tied densely enough to cover the mesh wherever the part is moved. The lace front and monofilament pages show what each construction looks like up close.
The cap interior: the view most buyers skip
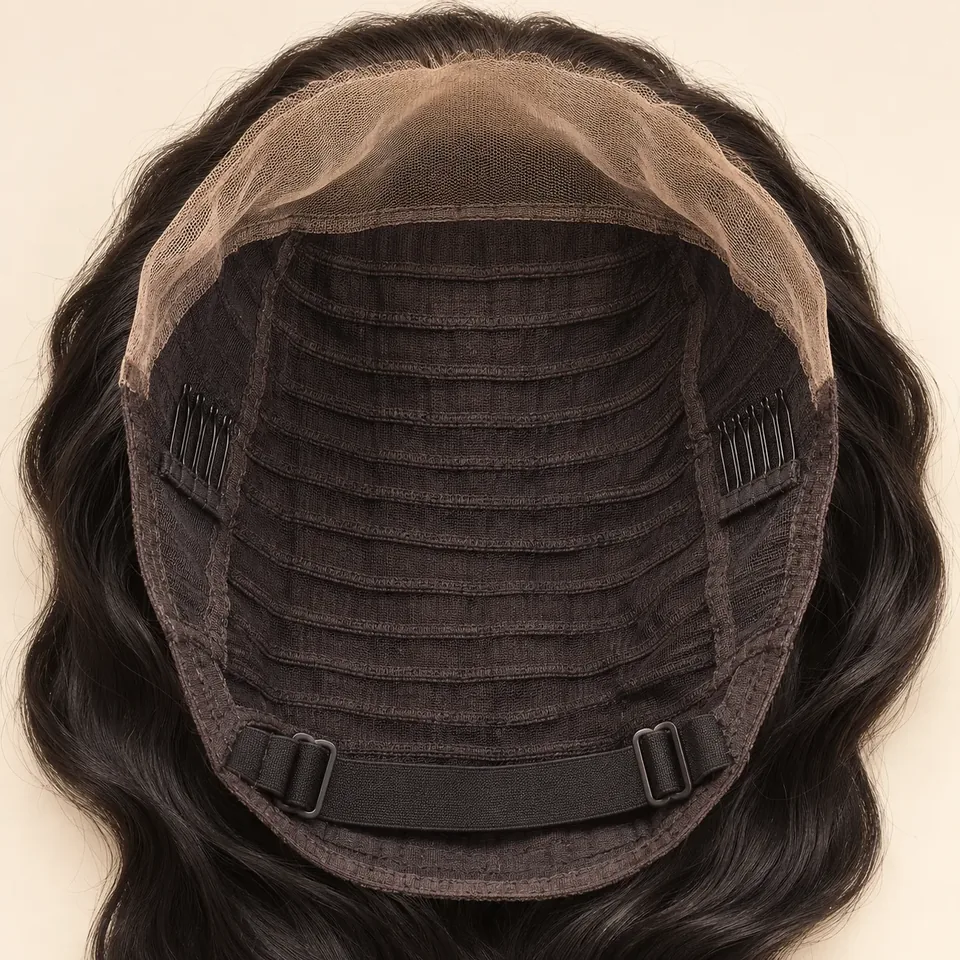
The last photo is the inside of the cap. It shows the seams, the adjustable straps at the nape, any clips or bands on glueless styles, and the size label. On hand-tied caps you can see the single knots spread across the cap. For medical wig shops this is often the most important view, because it shows exactly where a seam or strap will touch the head. If something inside the cap would be uncomfortable for your wearers, flag it under cap or fit. The revision then changes only that point. The wig cap construction guide explains how lace front, monofilament, hand-tied and glueless combine on one wig.
How to flag a change so the revision fixes only that
When something is off, write it as three parts: which field, which direction, and in which view. "Shade a little cooler, back view." "Layers: first layer lower, front view." "Part: mesh shows, part close-up." Shade changes are written as warmer, cooler, lighter or deeper. Avoid colour codes or percentages, since those mean different things to different suppliers. The revision changes only the fields you flagged, and it comes with a new daylight photo set taken the same way, so you can compare round against round.
| View | What to check | Field to flag |
|---|---|---|
| Front | Face-framing, first layer, both sides even, shade in daylight | Layers · shade |
| Side | How the wig sits by the face, bangs flat or lifted | Length · layers |
| Back | Nape finish, how balayage or root shade blends | Length · shade |
| Part close-up | Mesh hidden, scalp tone, part position | Part |
| Hairline close-up | Lace edge, lighter front row, lace tone against skin | Hairline |
| Cap interior | Seams, straps, clips, size label | Cap · fit |
What the photo set is used for after you approve
- Approved sample: you keep the wig you approved. We keep a matching reference wig and the photo set, filed under your shop name, style, shade and cap combination.
- Reorders: you name the approved sample by style, shade and cap combination. Before shipping, each wig is checked against the reference wig and the photos for shade, length, layers, hairline and cap.
- Before shipping: every wig is checked at three points: the hairline, the part and the cap interior. A wig that does not match is held back. You are told first, with photos, and it is remade or replaced before it ships.
- In your shop: you can use the photo set in consultations and on your own online shop.
Once a combination is approved, it stays the reference for every reorder of that wig. Each new style, shade or cap combination gets its own sample and its own photo set. See how wholesale orders are built from approved samples, or start by listing the wigs you want to see.